6.16.2014

copper garden signs


 Supplies:
  • copper sheeting
  • clay carving tools (I use this, this, and this)
  • piece of rubber (or any soft material you can carve into)
  • wire
Begin by cutting out a piece of copper a little bigger than you want your sign. Use the smaller stylus to write the words on the copper. Then, trace them with the larger stylus. You can begin with the larger one to avoid going over it twice, but I think it is easier to start with the small one.


Turn the sign over, and use the clean-up tool to raise the copper around the words. This will make the words stand out more. I like to start around the letters and work my way out.


Once finished, bend the edges of the sign around so that it is more curved. Poke a hole in each corner.


Use the wire to attach the signs. I put mine on the fence, but you can also put them on tomato cages, stakes, or whatever else is in the garden. Another option is to write the words vertically and stake the signs in the ground.


6.13.2014

friday inspirations

via sf girl by bay
I love the look of these graphic black and white blankets. I usually choose more colorful yarn when I crochet, but I might have to try something neutral soon.

via asos
I love this metallic straw bag. It would be perfect for the beach. I'm thinking of making a similar one with some metallic oil cloth. 

via  viva terra
Can you believe this indoor/outdoor rug is made of plastic bottles?? It is beautiful, and would look lovely on a porch with Moroccan style lanterns.

via viva terra
In my spare time, I love imagining designs for my future house. These shelves would look great in the black and white bathroom I keep thinking about...

Happy Friday!

6.11.2014

diy: spike necklace


This is a simple DIY for a long necklace with spiked beads. I bought all of the supplies at Beadworks, though Etsy has huge variety of beads and supplies for jewelry making. You can make it as long as you like. I made two, one long and one short, that can be layered or worn separately.


Supplies:
  • chain (I used about 28 inches for the long one)
  • 3 jump rings (use whichever size you like the looks of)
  • lobster clasp
  • spiked beads
  • pliers (round nose and flat nose)
First, string the beads onto the length of chain you want. Open the jump rings with the pliers and put one on each end of the chain. Add your last jump ring to one end and your lobster clasp to the other, then close the jump rings. I use two smaller rings for the ends of the chain, and a larger one for the other side of the clasp (as shown below).


6.09.2014

metal chair re-do


I found these chairs behind my parents' shed. Not only are they too beautiful to lay rusting away, but they also belonged to my grandparents. Once my patio was complete, I brought these out to try and bring them back to life.


They were not in very good shape, covered in rust and peeling paint. Before painting, they needed to be sanded to get as much of the rust off as possible and to smooth out the surface. This process can be done with most metal outdoor furniture.

(Please note: Anything painted before 1978 could contain lead. Please take precaution, as sanding lead paint is not recommended.)


On one chair, I was able to use the wire brushes and sand by hand. It wasn't perfectly smooth, but it still came out well. The other chair was so rusty that I had to use a palm sander.

Once smoothed, I used Rust-Oleum primer to prime the chairs. You can get a spray primer, but I wanted a heavier coating than what you can achieve with the spray. If you are working with furniture that has less rust, the spray should be sufficient.


I used this spray paint. The chairs needed two coats. I found it easiest to do both coats on the top first and then turn the chairs over to do the bottom. Once dry, I used an outdoor spray lacquer to help protect them.


Finished! They are not perfectly smooth, but compared to what they looked like before, I think they look great.


6.06.2014

weekend project: striped outdoor pillows


I found this beautiful navy and white striped fabric and decided to make outdoor pillows with it. The color looks really nice with my green chairs too. 

Supplies:
  • outdoor fabric (I bought 1 1/2 yards for two 18" pillows)
  • pillow forms
  • matching thread
  • measuring tape and pins
My pillow forms were 18 inches, so I cut two pieces of fabric 18.5" by 18.5". I wanted the pillow covers to be a little smaller than the forms, so that they were a little fuller. 


Pin your fabric right side together, allowing for a half inch seam allowance (this will make the pillow cover 17.5"). I draw lines where I'm going to sew, because I need the guide to stay straight.


Sew three sides together. On the fourth side, sew about two inches on each end. Iron the seams open.


Turn the cover right side out and put the pillow in.


Next, hand sew the pillow closed using a ladder stitch. There are a lot of video tutorials on how to do this. I must admit, getting the hang of the ladder stitch was very frustrating for me. I took me several tries to get it looking decent. If you've never done it before, you may want to practice on something else first.


6.04.2014

crochet: granny square blanket


I love the look of granny square blankets, but making dozens of individual squares and crocheting them together is sometimes too much for my patience. I decided to make one big granny square. It has a similar look, but is much less time consuming.

Supplies:
  • worsted weight yarn 
  • crochet hook (G6 or H8)
  • tapestry needle to weave in ends
I used about twenty skeins of Red Heart Soft yarn in five colors (grape, teal, guacamole, tangerine, and white). You can use either a G6 or H8 hook. The G6 is smaller and will give you a tighter stitch, while the H8 is bigger and will be a bit looser. The bigger hook goes a little quicker, but it all depends on the look you're going for. For this blanket, I used an H8 hook. 

Pattern:

(note: this pattern is written using American crochet terms)

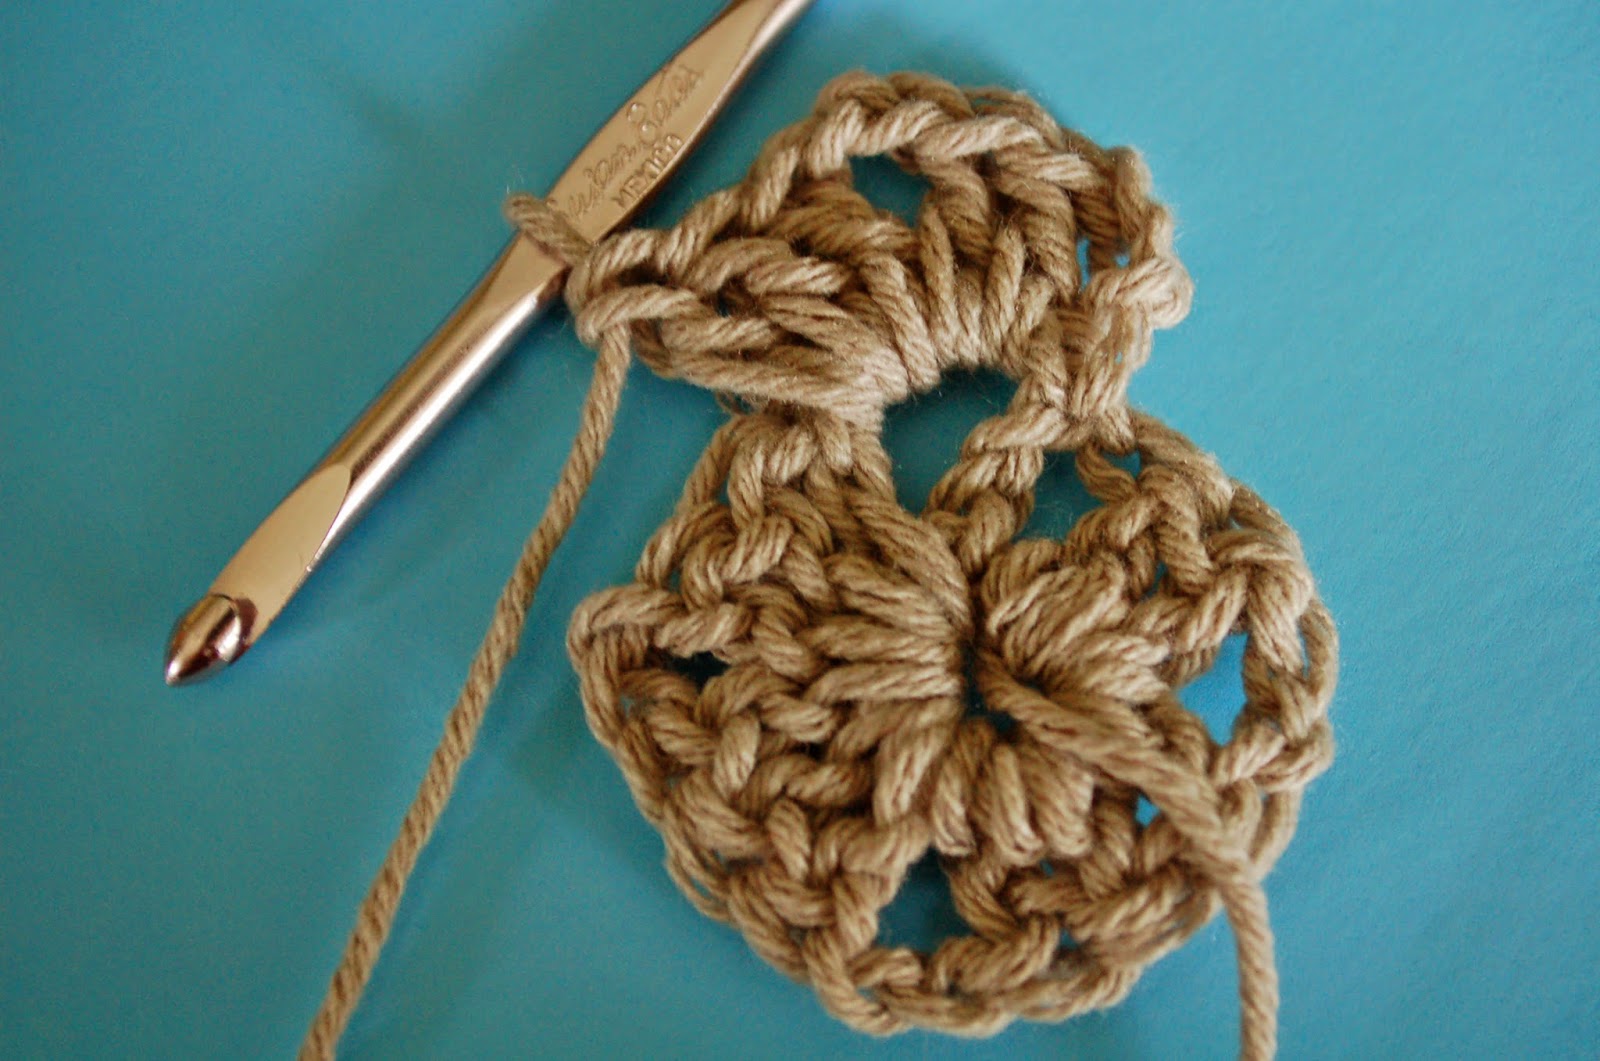
Round 1: Begin by making a slip knot and chain five stitches. Slip stitch into the first chain stitch. Chain 3, 2 double crochet (DC) into center. *Chain 2, 3 DC into center. Repeat from * twice more. Chain 2, slip stitch into top of chain 3. Turn.


Round 2: Chain 3, 2 DC into chain 2 space, chain 2, 3 DC into same space. *Chain 1, 3 DC, chain 2, 3 DC into chain 2 space. Repeat from * twice more. Chain 1, slip stitch into top of chain 3. Turn.


Round 3: Chain 3, 2DC into chain 1 space. *Chain 1, 3 DC, chain 2, 3 DC in chain 2 space. Chain 1, 3 DC in chain 1 space. Repeat from * twice more. Chain 1, 3 DC, chain 2, 3 DC in chain 2 space. Chain 1, slip stitch into top of chain 3. Turn.

Each subsequent round will be worked in the same way. In every chain 1 space, you will do 3 DC, chain 1. In ever chain 2 space, you will do [3 DC, chain 2, 3 DC, chain 1].

chain 2 space

chain 1 space


For my blanket, I did 16 rounds of each color with two rounds of white in between. So, 16 rounds of grape, 2 rounds of white, 16 rounds of teal, 2 rounds of white, etc. You can do whatever type of border you like. I just continued with the granny square, but on the last row I did [3 DC, chain 1, 3DC, chain 1] in each chain 1 space.


6.02.2014

garden makeover

Hello! I am back after a very long hiatus. I decided to change up this blog, and am going to begin posting much more consistently.

After having a very small but successful vegetable garden last summer, this year I decided to expand it and try a few new vegetables. I have a variety of peppers and tomatoes, Japanese eggplant, butternut and summer squash, cucumbers, cauliflower, and green cabbage, plus a whole assortment of herbs.

I can't wait until everything starts growing! I have a lot of recipes lined up incorporating the herbs and veggies, so hopefully everything takes well.


Enjoy your Monday!